Plugin setup
Click the images to enlarge them.
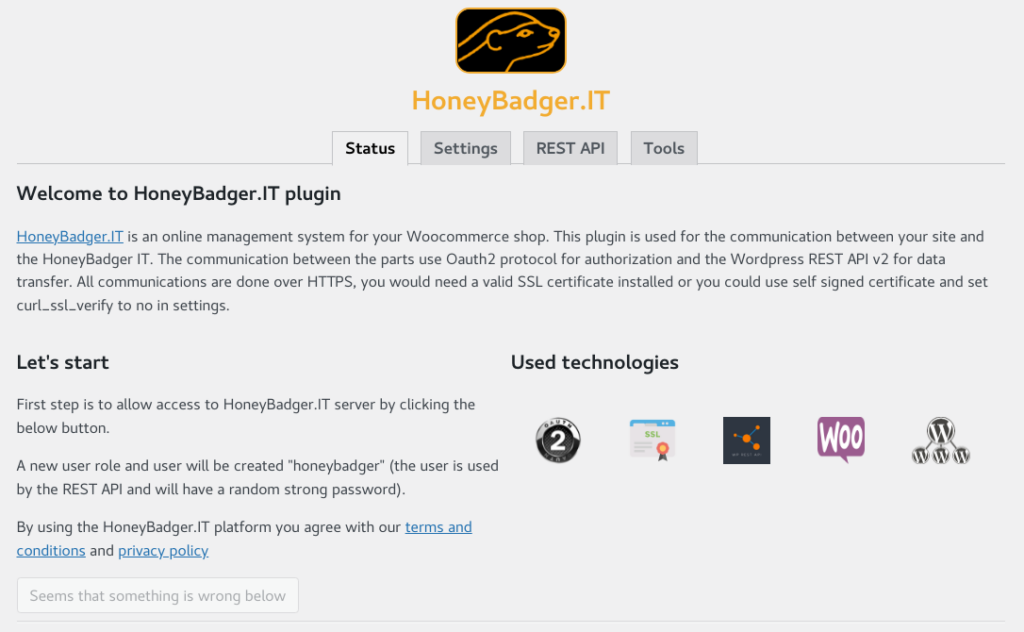
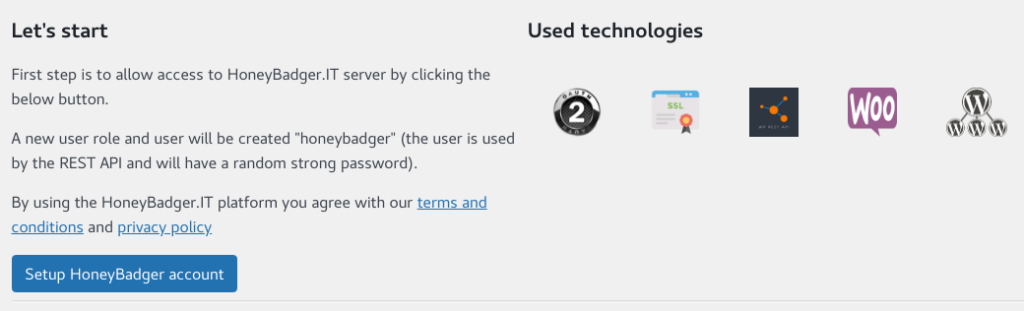
After installation go to the HoneyBadger.IT plugin admin Status page which will show a page like the below.
If the setup button is disabled seams that something is wrong and we scroll down to see why like in the image.
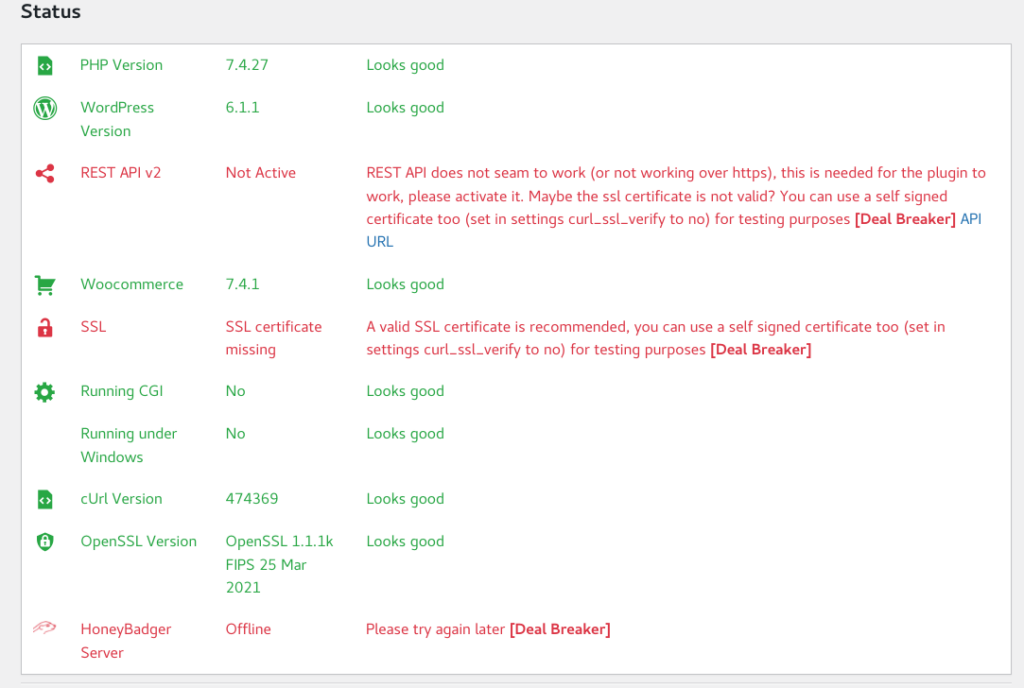
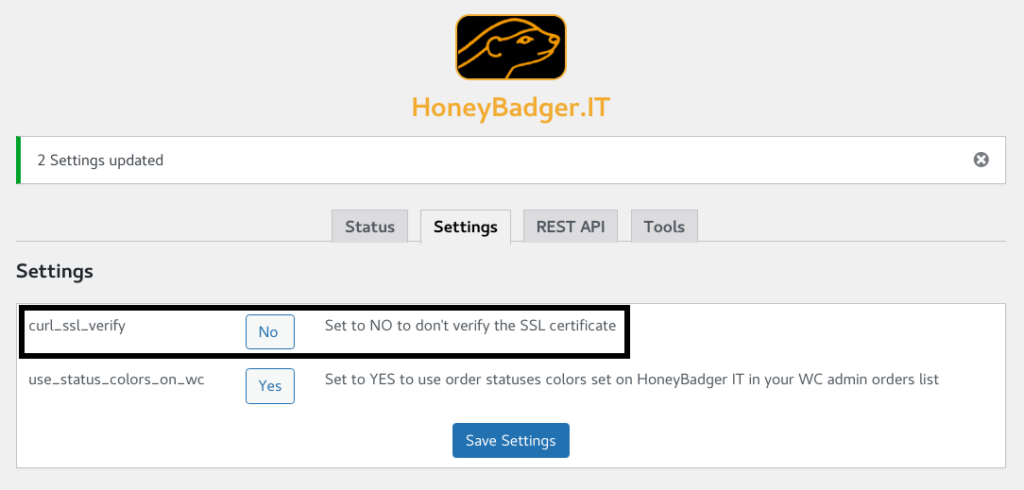
In the image above we can see a few issues in red text, all of these are shown because the SSL certificate is a self signed one, for development we can use a self signed SSL certificate, but we need to set the plugin to do not verify the SSL certificate in Settings tab as shown below.
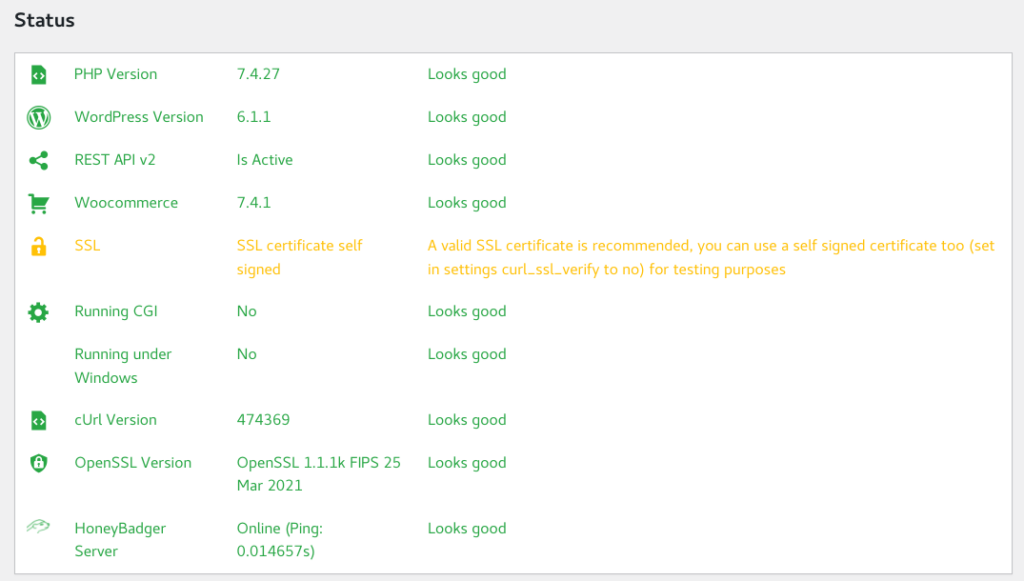
Afterwards if the only issue was the SSL self signed certificate you should see the status as below.
Now we can start the setup process and click the Setup HoneyBadger account button.
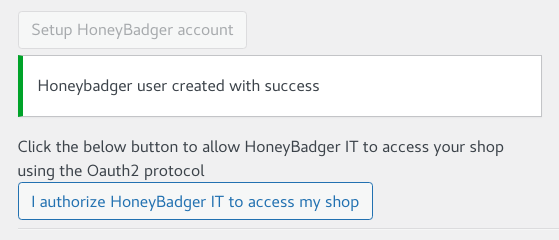
After we click the Setup HoneyBadger account button we will be presented a button to authorize the HoneyBadger.IT platform using the Oauth2 protocol to access the shop as in the below image.
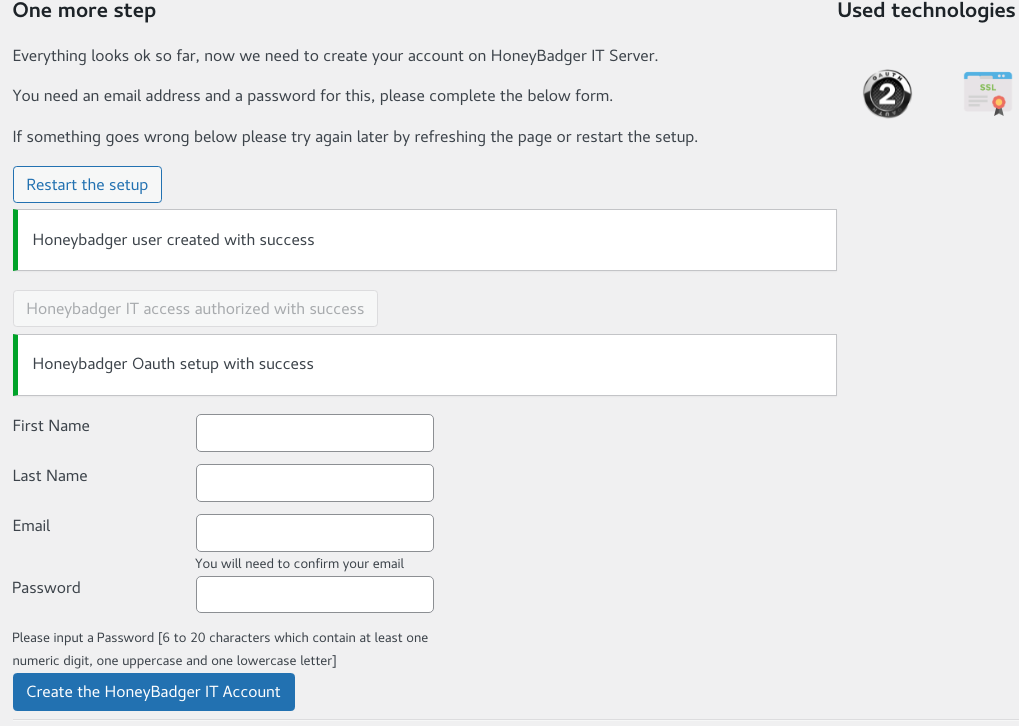
After authorization is granted you can create your HoneyBadger.IT platform user account as shown below.
After the HoneyBadger.IT platform user account is created you will receive an email with a verification link in it to activate your account.
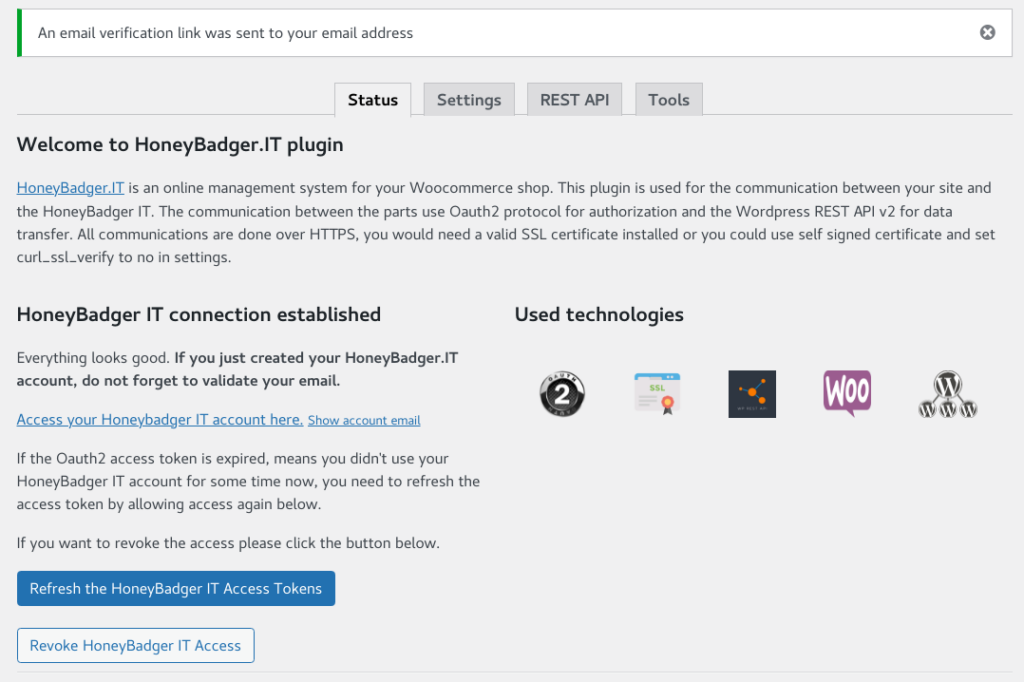
You can always revoke the access to your shop by clicking the Revoke HoneyBadger IT Access button.
If the authorization tokens have expired and you see a message on the platform that the link with your shop is broken you just need to click the Refresh the HoneyBadger IT Access Tokens.